This is a new topic in 12.03.
This is a new topic in 12.04.
Content highlighted in yellow is new in 12.03.
Content highlighted in blue is new in 12.04.
-
Right-click the contract you wish to create a workflow for, or left-click the contract and click the menu icon
 , and select Create Contract Workflow. This will open the Create Contract Workflow for window.
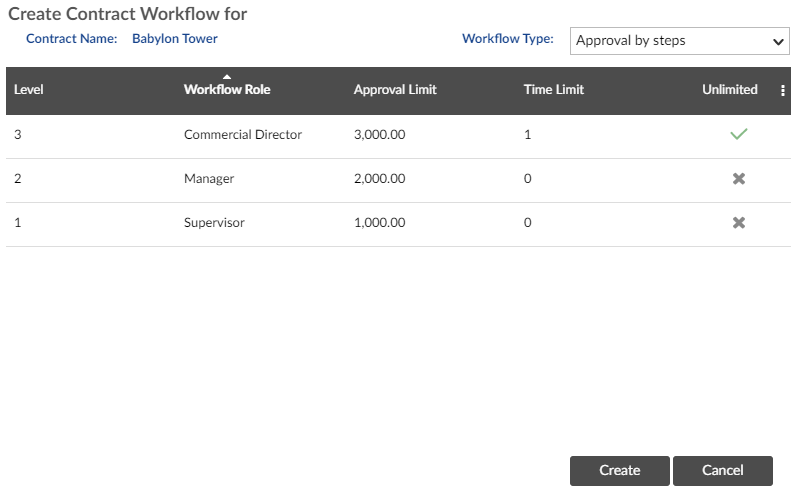
This window shows a list of the workflow roles associated with this contract. The Approval Limit is the maximum value of a payment notice or pay less notice that can be approved by users assigned to that role. The Time Limit is the number of days users assigned to that role have to approve a notice before it gets moved to the next role for approval. If there is a tick  in the Unlimited column, that role has no approval limit, regardless of the value in the Approval Limit column.
The workflow will initially be populated by the default workflow roles (see Default Workflow Roles). You will not be able to edit any of these roles or add any new ones at this stage. If you wish to deviate from the default setup, see the next section (Updating a Contract Workflow).
-
Click
 to create the workflow.